After completing this lesson, you’ll be able to:
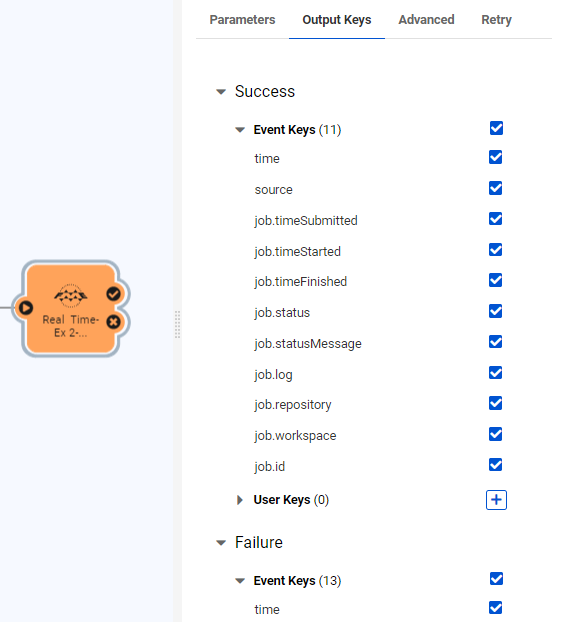
As mentioned in the previous section, all Workspace Actions will have two output ports by default (one for success and another for failed jobs). Each of these ports will have a set of Output Keys on them. These Output Keys allow for passing some basic information about the job that was run to any Actions connected downstream from that port.
For example, a user may want to set up a workflow in which an email containing the job log file is sent to an administrator when a job fails. They could do this by connecting an Email Action to the failure port of the Workspace Action and use the job.log Output Key in the attachment field within the email configuration to pass in the path to the log file.
But what if you need to pass more detailed information to an Action within your Automation? For example a summary of the number of features that were written out or a list of files to be processed by other Workspace Actions within an Automation.
This is where the Automations Writer is useful. The Automations writer can be added to any workspace to create additional output ports when the workspace is used in an Automation. The Automations writer can be added to a workspace in the same way any other writer is added. One output port will be created for each feature type added to the Workspace Canvas and all attributes on each feature type will be included as Output Keys within the Automation.
For example, this writer has two feature types (Output_One and Output_Two) with different sets of attributes on each. The image on the left shows how this looks within Workbench and the right shows the same Workspace used within an Automation:
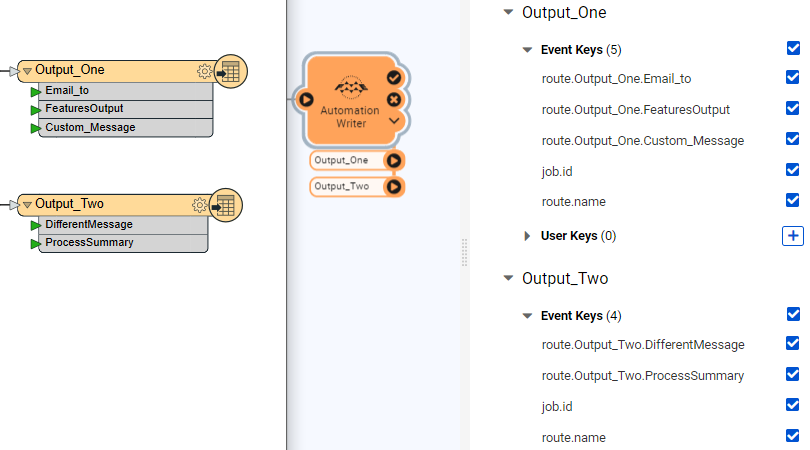
The Automations Writer allows for lots of flexibility in what information gets passed out of a workspace. It can be used to create as many output ports as needed to allow for advanced filtering within the Automation to trigger specific Actions in response to anything that may happen within a Workspace. Multiple features can also be passed into any Automations Writer feature type to allow for triggering an Action multiple times.
We've now looked at how to set up a workspace to be an Action (reacting to incoming messages) and how to set up a workspace as a Trigger (sending outgoing messages). A workspace can do each task individually, but when it is set as both an Action and a Trigger, the overall setup looks like this:
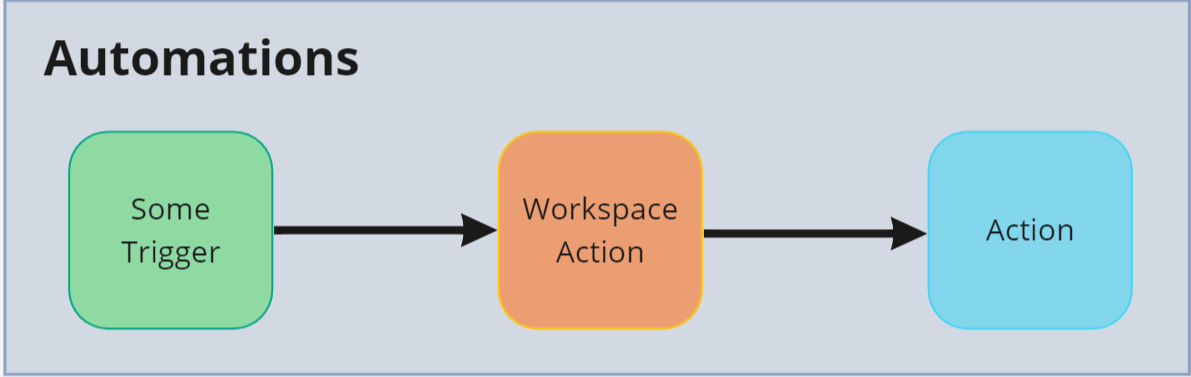
Unlike most Triggers/Actions in Automations the Run Workspace node has both an incoming and outgoing port meaning it can both receive messages from a Trigger, and continue the Automation by sending messages out to another action upon job completion.
In this scenario, the same workspace that receives an incoming notification also sends an outgoing notification. For example, details of a lightning strike are received via a Websocket trigger. This trigger starts a workspace that processes the incoming information; for example, it determines which state/province/county the strike occurred in. The workspace then creates a new message and dispatches it to a WeatherAlert Action.
